
The snowy season has arrived, but have you finished all of your fall maintenance yet? Before the snow and ice really comes down, it’s important that your outside AC unit has been properly winterized. Completing this maintenance will make sure the unit is protected throughout the winter.
Step 1: Before you begin winterizing the AC unit, locate the electrical circuit on or near the unit. Open up the lid and flip the switch to the off position. Doing so will prevent the AC from turning on if there’s ever an abnormally hot day this winter.
Step 2: Clean the unit of any leaves, debris, dust, animal droppings, etc. Give it a good wash down with the hose and allow it to dry before attempting to cover it.
Step 3: Purchase and install pipe insulation for the exposed pipes that connect the unit to the house. Measure, cut, and install the foam insulation, followed by taping them in place.
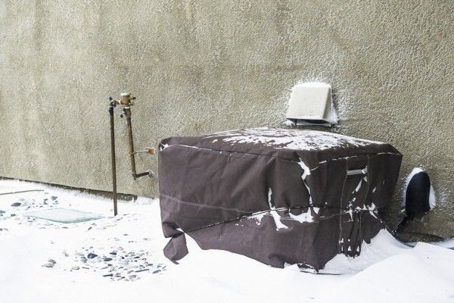
Step 4: Purchase a cover for your AC unit, preferably a waterproof one made from plastic or vinyl. Opt for covers that are specifically made for covering AC units. However, you can use a normal plastic or vinyl sheet that is measured and cut to the proportions of the unit.
Step 5: Once the cover is installed, wrap it with bungee cords or rope. This will prevent the cover from blowing off during windy conditions. Make sure the unit is wrapped tightly with no openings that could allow snowfall in.
Once your AC unit is successfully covered, make sure to check on it at least once per week. Brush off any snow and remove any debris that might be sitting on top of it.
Winterizing your outside AC unit can help prevent it from becoming damaged and in need of repair. When your outside AC unit or heating system needs repair, contact Tri-City Appliance, Plumbing, Heating & Cooling. To learn more, or to schedule an appointment, give us a call at (203) 303-5700.